This experiment/lesson has been designed for a class of second graders who are learning about the States of Matter. It’s pretty easy to throw in a introduction to Energy.
Here’s everything you’ll need (except the students – you’ll have to find them yourself):
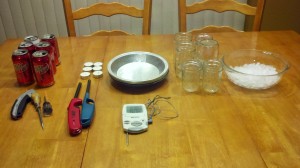
PART 1: Teacher Prep
The teacher, or a parent volunteer (like moi) needs to prepare these stoves ahead of time. It is also an appropriate project for an older kid, who won’t fuss too much if she gets a cut. But definitely not in a school setting (liability!) without some gloves, goggles, etc.
I don’t really think an adult needs to wear any safety equipment unless 1) you are likely to sue me if you get a booboo, 2) you are accident prone. My husband is quite adamant that he’s not accident prone but if you’re like him (not accident prone, and lots of bumps, cuts and bruises to prove it) maybe you should wear gloves, too.
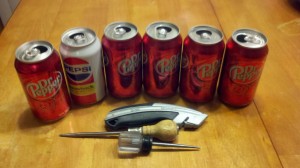
You’ll need some aluminum cans, but don’t use your beer cans. I can’t stress this enough. Â Students have big mouths.
Other stove-making supplies:
- Aluminum Cans (yeah, I already said that)
- Old utility scissors (don’t use the hair-cutting scissors or the sewing scissors)
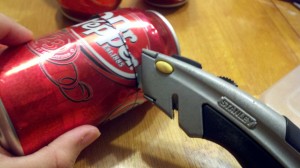
- Utility knife
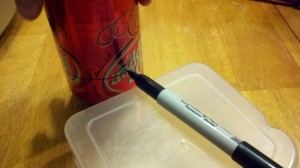
- Sharpie (optional)
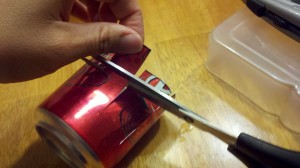
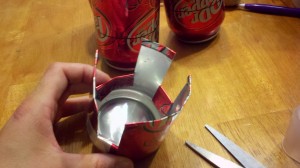
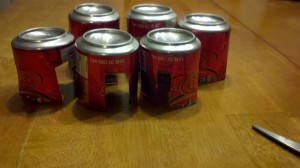
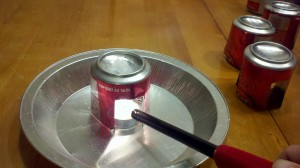
You’ll need to cut up the cans. How you do it is up to you – but you need to get the top off and discard (recycle) and get air vents into the stove. Teaching opportunity: Candles burn, Burning=Oxidation, and what does OXidation require? Ding ding ding – that’s right! Oxygen. So give the candle some air. Here’s some ideas. I folded the bottoms up to be slightly less of a cut-hazard, but honestly, there are still sharp edges all over so the best bet is to just BE CAREFUL.
PART 2: The Energy and Matter
This is where the kids get involved.
I do the kids-in-motion demo, here.
Pick one lucky student to be the sun (light source/energy source). Give him a white, fluffy blanket to hold. He’ll shine varying amounts of light on the kids.
The other kids will be matter in a form familiar to them – water. Tell them to line up in neat rows. Tell them to keep an eye on the sun. Â Remind them that the sun is the source of energy.
When the sun is hiding – the kids don’t have energy. Ask what phase of matter they are (Solid). Ask what solid water is called (ice, snow, hail…)
When the sun starts coming out from behind the clouds, the water will absorb some energy. They should start moving.
When the sun is completely out, the water will absorb even more energy. This is called, class, “evaporation”, and results in water vapor, a form of gas! Some of the students will gain so much energy they will escape from their nice neat rows. Use this to your advantage (after you hide the sun behind a cloud and freeze the molecules). Explain that gas escapes easily if not well-contained.
Repeat as necessary. You can do a lot with this. Ditch the sun, and ask the kids to demonstrate other liquids (milk, lava), other solids (ice cream, rock), etc.
PART 3: The Experiment
This is where we put kids and fire in the same room.
Obligatory Safety Comments:
- Students with long hair should keep it pulled back. Parents don’t like Tiki-Torch Daughters.
- Consider passing goggles out to all of the kids (even those who wear glasses). It’s good practice for college (and all of your students are going to college. Yes, they are.) and there is always the possibility of hot wax flying through the air at some point and finding an eyeball. Not a probability, but surely a possibility. Parents don’t like buying eye patches for their daughters. It’s so hard to match them to your prom dress.
- Keep a glass of water nearby. Never put a lit candle near flammable material. Don’t leave the lighter/matches in reach of science-crazed Second Graders. Just remember fire safety. This goes back to the Tiki-Torch Daughter comment.
The kids now have done enough background “research” to formulate a hypothesis. Explain that a hypothesis is a prediction based on observation, research, etc.
Depending on the age group, they may be able to formulate their own hypothesis on the relationship between energy and the phases of matter, but you might want to give them two choices. They need to decide if matter whill change from solid ->liquid->gas as a result of energy gain, or energy loss. Have them vote on one choice, and test the hypothesis that most of the students have voted on.
Group 1
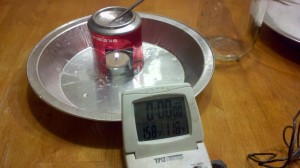
This group will test the hypothesis directly. They use a light source (candle) to change the phase of water from solid, to liquid, to gas.
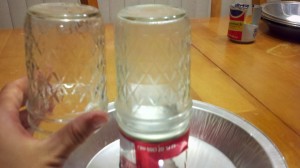
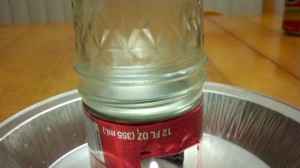
I used two jelly-jars here to show that we really are seeing water vapor.
Warning: Don’t just leave the jelly-jar here like I did. It will fall, and then the stove will tip, and then the candle will flip, and then the hot wax will spill. Ask how I know.
This one is neat  because you can actually see the opposite of evaporation taking place – condensation. Can we say, “oooh!”. Yup.
Group 2
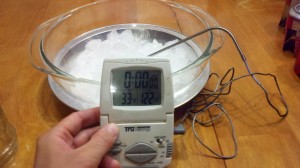
This section could use a bit more work. If anyone would like to re-do my worksheets let me know. The idea is simply to split the class up and fulfill a few more Standards and Benchmarks by having the students use a thermometer, record data, analyze data, etc.
They are “proving” that light = temperature. See, not a strong lesson, but it does allow them to monitor the temperature from ice to very hot water.
The kids need to operate a timer and record the temperature of the water every 2 minutes, as it is changing phases (It stabilizes in less than 10 minutes). This gives them a chart of  time vs. temperature, and there is a lot of good stuff you can do with that.
Audience: Second Grade Public School Class, Homeschoolers
Audience Size: 1-24 students
Time Spent on Lesson: 35 minutes (Part 3, Group 2 wasn’t taught in this go-round).
Standards Addresssed:
St 1
B1: PO1, PO2, PO4
B2: PO1, PO2
B3: PO1
St 2I
B1: PO1, PO2
B2: PO1, PO2, PO3,
St 3
B1: PO3, PO4
Contact me via comments for the actual lesson plans – I have 2 student worksheets (Group one and Group two), 2 teacher worksheets (Group one and group two), and speaker/introductory notes. As of 11-2010 I can say that I check my email daily and would likely get back to you w/in 24 hours.

It is the kind of sunglasses that looks good on the shelf and makes you even look better when you put them on. You can also opt to convert it to prescription sunglasses and it won’t be any less good.