Water: Fun for the Littles

We have 48 hours of stuck-in-the-house time as the Big Winter Storm blows through the area.  “Big” is relative, as we’re only 50 miles from the US/Mexico border, but local resources are stretched to the breaking point, so there you are. This is Part One (see Part Two)

Water Play!

Never leave a baby or toddler unattended, even for a moment, with any amount of water.

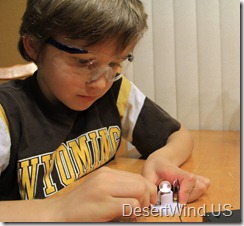
  1. 20110202_211Strip baby to diaper.
  2. Fill a shallow container with water. I even put a few drops of dish soap into the water,* since I knew my daughter wouldn’t drink it but would enjoy the bubbles. If you think your baby/toddler will try to drink the water, you can skip that step.**
  3. Place the shallow container on a towel in the middle of a non-carpeted floor.
  4. Add cups, floating objects, and adult supervision and you get Insta-Joy.

* I totally did not add dish soap just so that when it spilled on the floor and my son cleaned it up, I’d have a really clean floor.

** Even ingesting it, I don’t think the dish soap will hurt her in small quantities.  I’m basing this on the fact that my mom used to “wash my mouth out with soap” for cursing and nothing is wrong with me. With me. With me. With me. Damn it.

Categories: Kids | Tags: , | 1 Comment

What’s in a Golf Ball?

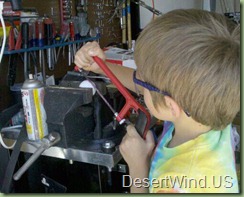
Sawing golfballMy son asked us, this past summer, what’s inside a golf ball.

This experiment is extra fun because you can tie it into your golf game (I don’t play golf, so I did not), geology (I am a geologist, so I did), and good mechanical/shop skills.

Purpose:

Find out what’s in the middle of a golf ball.

Background Research:

Analyze the golf ball. Does it float or sink in water? Does it bounce? What does the surface appear to be made of? Can you think of other tests to perform on the golf ball?

Hypothesis:

The hypothesis simply states what your child thinks she will find in the center of the golf ball, based on her background research.

Materials:

  • golf ball
  • vise
  • hack saw with new blade (you may need two-three blades)
  • safety goggles

Procedure:

  1. Wear goggles. Your child has her hypothesis, but she can’t be sure what’s inside the ball. YOU should have some idea*, but she won’t. This is part of the fun.
  2. Clamp the golf ball into the vise (if possible, let your child do this herself).  Ideally, it shouldn’t be too tight because that will make it more difficult to cut. However, it needs to be tight enough that it won’t wiggle around.  Fiddle with it a bit. Kids love playing with vises so let her take her time.
  3. Show your child how to change a blade in the hack saw. One side is sharp. You know this, make sure she knows this. The properties of a hack saw are not enhanced, to any appreciable degree, by the addition of blood.
  4. At this point your child may be feeling quite mechanically accomplished. If this is her first foray into your shop/garage, you may be feeling quite parentally accomplished. Give each other a high five.
  5. Start cutting. I started the cut for my son, just because the hacksaw can slide around before the first ridge was cut.  Your child’s fingers shouldn’t be anywhere near the ball or saw blade (please see above photo), so it’s up to you, but be sure to stay nearby.
  6. Adjust the position of the ball as necessary to get entirely through the ball.

*There are two probable golf-ball gut scenarios.

      1. solid core
      2. liquid (non-toxic) core

Results:

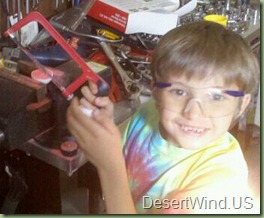
DW Golfball2After your child finishes cutting the golf ball open, have her analyze it again. What does she see?

Conclusion:

Your child based his hypothesis by analyzing exterior properties of the ball (density, bounciness, etc.). Have her restate her hypothesis now that she has seen the interior of the ball. Was her reasoning sound? Was her hypothesis correct? If it wasn’t, that’s okay!

Science-y Parallel/Parable of the Day: Geologists can’t cut the earth in half to learn about about the earth. Just as your child couldn’t scratch very deeply into the plastic shell of the golf ball, a geologist can’t “scratch” much of the Earth’s surface and must gather information from the surface.


A small junior hacksaw and extra blades can be picked up very cheaply from Walmart or Harbor Freight.  Since hacksaws are good for other noble pursuits, such as building PVC Marshmallow Shooters, you should persuade yourself that they are a good addition to your child’s Young Inventor’s Kit.

Visiting from Skip to my Lou? Be sure to let me know what you think!

Categories: Kids, Science | Tags: , , , | 1 Comment

DIY Young Inventor’s Kit!

For the low, low price of a laundry basket, Rubbermaid tote or similarly sized cardboard box, you too can start a Rube Goldberg-esque Inventor’s Kit for your child.
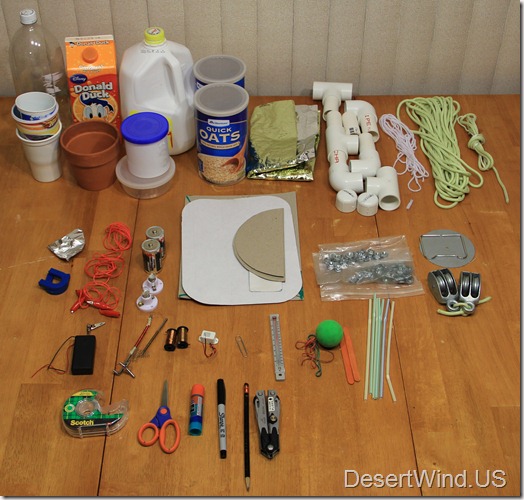
DW DIYa


Step 1: Get a laundry basket-sized container.

Step 2: Fill!

The choice of odds and ends is up to you, and limited only by your creativity and common sense.* Cleaned food containers are a good start, but should be supplemented with other connectors and gadgets. Some suggestions for

Materials:

  • Glass spaghetti jar with lid
  • Plastic sour cream/yogurt/dip containers with lids
  • Baby food containers
  • Juice/Milk/Soda cartons/bottles
  • Foil pie plates
  • Candle
  • Matches*
  • Knife*
  • Rope – wound neatly
  • wire (insulated and uninsulated) – wound neatly
  • Nails, screws, nuts & bolts (~10 each)
  • A few feet of aluminum foil
  • An old Mylar balloon
  • Paper towel/Toilet paper tubes
  • Squares of corrugated cardboard and cardstock (old boxes/old cereal boxes)
  • Small pad of paper (for plans and for projects)
  • Pencil, pen, permanent marker
  • Scissors
  • Paper Clips
  • Masking tape
  • Pipe cleaners

So far, these are just things we usually have laying around the house. For added interest, head to Radio Shack, Harbor Freight, etc. and pick up:

  • LED Lights
  • Battery holder
  • Batteries for your battery holder
  • Small light bulb holder
  • Small light bulbs
  • Wire leads with alligator clips
  • Pulleys
  • Gloves
  • GOGGLES**

DW DIYb*This harkens back to previous posts where I’ve discussed “knowing your child’s limitations”. You know your child best. I’ve worked with 4th and 5th graders who could easily handle matches and knives with supervision, and I’ve no reason to suspect that mature and supervised kids even younger than this would have any problems with them. Actively supervised children should find it very challenging to burn the house down. If, however, you find that your child is particularly or distressingly gifted in this one respect, please plan (and store) your Inventor’s Kit accordingly.

**This ended up at the end of the list, but it really should be at the first. Get goggles, especially if you or your child is planning on whacking, banging on, or hammering anything, mixing chemicals to see what will happen, or cutting/breaking anything like rocks, glass, tile, brick, etc. I’m big on this. I’ve seen the edge of a rock hammer sliver off and fly into a classmate’s eye on a college geology trip. Vision isn’t something to take chances with, especially when you get a pair of safety goggles for $3-$5.

Store the small items in some of your glass/clear plastic jars.

Now you and your child are ready to invent, engineer and experiment. As an added advantage, you’ll now have a wealth of available supplies when you find out that while your offspring’s teacher assigned a science project two months ago, the child in question conveniently “forgot” about it until the night before the due date.  If you’re thinking that your child would never do this, well then, just pat yourself on the back and put one of these kits together anyways, because your child’s best friend’s mom is probably headed over to your house to borrow it right now.

I’ve purposely left out chemicals, even household ones such as baking soda and vinegar. I think it’s best to keep them stored in their original container, and keep them stored as you would store any potentially harmful product.

Coming soon: Experiment ideas using your kit!

Comment here with other items you might add to your inventor’s kit!

Categories: Kids, Science | Tags: , , , , , , , , | 3 Comments

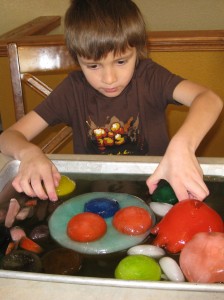
Have an Ice Time (Transfer of Energy)

Our science projects this year have all fallen under the broad umbrella of “Energy”. This art project seemed to fit the bill.

Materials:
Food coloring
Cookie sheet or tray
Interestingly shaped household containers*:
mini loaf pans
paper cups
rubber glove
balloon
flexible molds
muffin tins

* Stay away from glass containers. You may need to dip them in warm water to loosen the ice, and now is not the time for a Lesson in Thermal Shock. Unless you want it to be, in which case, wear goggles and maybe some gloves… I’d probably skip it this time.

Method:
1. Place a drop of food coloring in each container, and then add water.
2. Freeze.
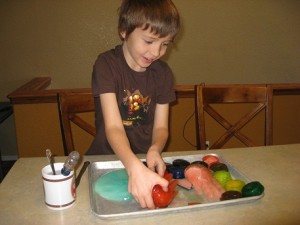
3. Release your frozen puckies onto a large cookie sheet or tray – the kind with a lip (this is important)  If the frozen puckies perversely prefer the security of their containers to, say, the destructive grasp of your little angel, just dip their container in warm water for a few moments and they’ll slide right out.
4. Give child the frozen puckies on tray.
5. Give your child things to shape the ice with.*
*Safety note: YOU know your child. If your child is accident prone, now is not the time to give him a screwdriver, hammer, and retire to the other room to catch up on Glee. Metal things like spoons and some hot water, plus supervision, is appropriate. Energetic stabbing motions with forks should be discouraged.

Possible Lessons for the Enterprising Parent (i.e. The Parent who Drives their Children Nuts):
1) What happens to the volume of water when it freezes? Mark the level of the water in your container(s) before freezing.
2) Transfer of Energy: Freezing involves a loss of energy. When the water freezes, where does the energy go? When it melts, where does the energy come from? Why does a spoon that’s been sitting in hot water melt the ice more quickly than the spoon sitting in ice water?
3) Which freezes faster? I know many of us have heard that hot water will freeze more quickly than cold. Formulate a hypothesis and test it! (hint: this is a good practice science fair project for the young ‘uns).
4) Try making a couple puckies with sugar water*. Does it freeze differently? Melt differently? Why?
*Maybe don’t let them play with the sugary puckies. Or maybe do – I don’t have to clean up after your children.

Visiting from Skip to my Lou? Be sure to let me know what you think!

Categories: Science | Tags: , , , | Leave a comment

A Few Christmas Vacation Science Projects


Looking for something fun to do with the kids over Christmas break? Here are a few science projects I’ve found on the web.

This has two Christmas suggestions.

  1. Identifying mystery powders, includes a decision chart and backstory (I’m guessing Mrs. Claus isn’t very good at food storage safety). Requires basic household supplies: baking powder, baking soda, flour, powdered sugar, baby powder, corn starch, vinegar, and iodine.
  2. Chromatography Christmas decorations (requires coffee filters and non-permament dyes, like those in an overhead marker. I’ve even seen it done with M&M’s)

2.  Christmas Ornament (Crystals)

A holiday variation on your typical crystal garden experiment.

3. Examining Snowflakes (Crystals)

This one requires children to collect snow flakes as they fall, inspect them, and record their observations. Not really an option here on the border, but maybe you’ll have a White Christmas at your house!

4. Old Fashioned Sponge Candy (Acids and Bases)

The combination of vinegar (acid) and baking soda (base) makes a foamy candy.

5. Interplanetary Christmas

What would Christmas be like on the other planets in our solar system?

6. And don’t forget to let the kids help you with the baking! Cooking is full of math and chemistry, and it’s yummy, besides.

Categories: Cooking, Crafts, Kids, Science | Tags: , | Leave a comment

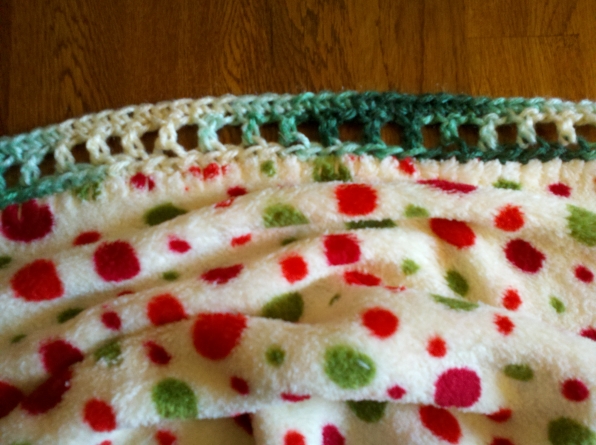
Crochet a Border on a Store-Bought Lap Blanket

Woohoo – fast and easy Homemade Christmas project. The store-bought throws that are $5-$10 at every store during the holidays often have a whipstitched edge, which works perfectly as a base row for a personalized crochet border!

Talk about an easy AND satisfying first crochet project – lots more useful than making crocheted washcloths and potholders by the dozen.

This border was made with three stitches, the Single Crochet Stitch, and Double Crochet Stitch alternated with a Chain Stitch. Older children will easily be able to master these stitches, and may have some fun creating their own. Here are two video tutorials I found useful. (Yes, you can teach yourself to crochet via YouTube. I did!)

Single Crochet Tutorial on YouTube
Double Crochet Tutorial on YouTube
Chain Stitch Crochet Tutorial on YouTube

This one is headed to a local nursing home, along with a new pair of slippers.

Categories: Crafts | Tags: , | Leave a comment

Santa Loves Doggies…

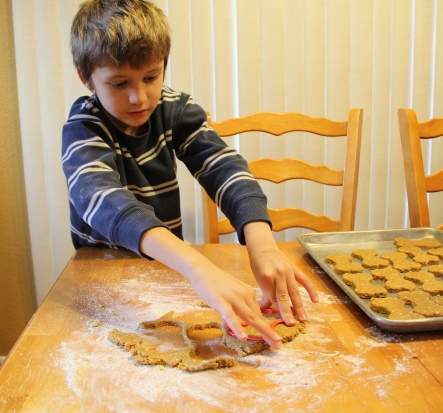
… And so does Boo! He’s making his favorite four-legged friends a special present this year.

Dog Biscuits

2-3/4 cups whole wheat flour
1 cup oatmeal flour (or oatmeal)
3/4 cup powdered milk
1 cup finely chopped carrot
1-1/2 teaspoons cinnamon
3 tablespoon wheat germ
1/2 cup peanut butter
3 T oil
1 T molasses
2 eggs
1/2 cup ice water

Preheat oven to 350 degrees F (175 degrees C).

  1. In a medium bowl, stir together the flours, powdered milk, cinnamon, and wheat germ.
  2. Blend the remaining ingredients in a blender till smooth.
  3. Combine wet and dry ingredients. Dough should be just wet enough to stick together; add a tablespoon of flour or water if needed to adjust consistency.
  4. On a lightly floured surface, roll the dough out to 1/2 inch thickness and cut with cookie cutters. Place biscuits 1 inch apart onto an ungreased baking sheet.
  5. Bake for 25 to 30 minutes in the preheated oven, until firm. Cool before serving. For a crisper biscuit, after baking, dry the biscuits in a warm oven (200) and turn occasionally till they are as dry as desired.

Modify the ingredients list as needed for special dietary concerns.

Categories: Crafts, Pets | Tags: , | Leave a comment

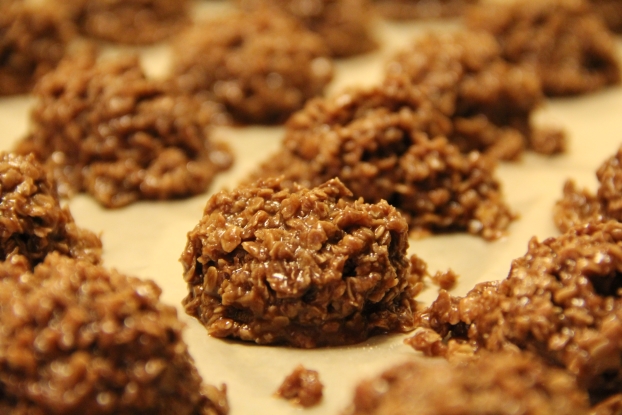
No-Bake Chocolate Oatmeal Cookies

  • 1 cube of butter
  • 1/2 cup milk
  • 2 cups sugar
  • 4-4.5 cups oatmeal
  • 3 tablespoons cocoa
  • Heat the first 3 ingredients in a 3 quart saucepan over medium heat, stirring frequently.  Bring to a hard boil and boil for one minute. Remove from heat.

    Stir in oats and cocoa. Quickly spoon  in heaping teaspoons onto waxed paper. Eat when cool!

    Categories: Cooking | Tags: | Leave a comment

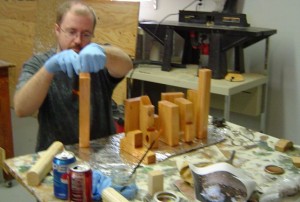
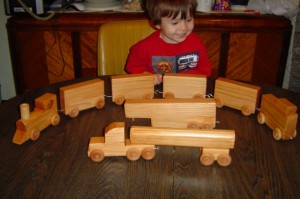
    Train and Truck Set

    The finished set has:

    • a train engine
    • Caboose for the train, or a camper for the pickup
    • A truck (can be a semi or a pickup)
    • One semi trailer
    • One tanker
    • 4 trailers/cars.

    The truck can be used as a pickup (using the caboose as a camper), or as a semi-truck. We had to make two different trailers because both of Boo’s grandpas are truckers, and one was currently hauling tankers.


    Visiting from Skip to my Lou?  Be sure to tell us what you think!

    <a href=”http://www.skiptomylou.org/” ><img src=”http://www.skiptomylou.org/wp-content/uploads/2010/01/button2.jpg” /></a><br />

    Categories: Crafts, Kids | Leave a comment

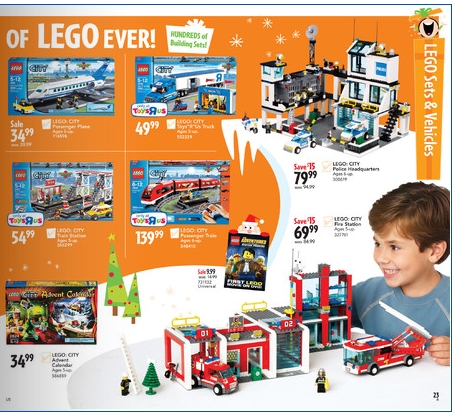
    Yet Another Rant Against Sexist Advertising

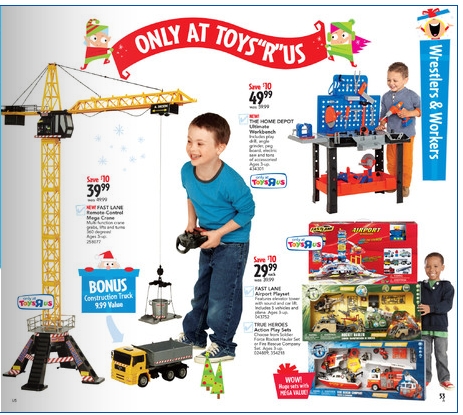
    Page from 2010 ToysRUs Catalog

    Page from 2010 ToysRUs Catalog

    This blog was published yesterday (on November 19, 2010) and is already making its rounds.

    An excerpt:

    “As we enter the holiday season, the inevitable toy catalogs begin arriving on our doormats. Most of the celebrations this time of year involve some form of gift giving, and if you have kiddos, that means t-o-y-s. Toys, toys, and more toys!”

    This (advertising toys in a gender biased manner) is a big problem. Somewhere around 5th-7th grade girls are losing their excitement for math/science. We aren’t getting enough girls in the STEM (Science, Technology, Engineering, Math) fields. Why is that happening? These same girls loved science and were competent in math in 4th-5th grade.

    When was the last time you saw a picture of a girl on a Hot Wheels package? Hot Wheels are a good introduction to basic physics. There are girls on the Duplo packages – the pink/aqua/violet jumbo building blocks. Only boys are on the standard (Lego) sized building blocks.

    One of the things that gets kids to stick with Math and Science is the sense that they have acquired a certain degree of competence in it. Competence comes with practice; it’s not necessarily innate. Practice through play is one of the most fun and efficient ways to learn. Toys that are marketed primarily to girls are less likely to encourage these competencies than are those marketed primarily to boys.

    Page from 2010 ToysRUs Catalog

    Page from 2010 ToysRUs Catalog

    Advertising works, that’s why money gets spent on it. We need to question a practice that implies a good girl needs to pick quiet activities, obsess over appearance, and choose pink toys. There’s not anything wrong with a girl (or boy) choosing activities like these of their own volition, but it doesn’t seem to be doing girls (as a whole, and I’m basing this solely on data concerning girls/women in STEM fields) a lot of good to subject them and their parents to powerful, effective, and expensive advertising in order to influence their behaviors in this way.

    This, of course, is just the tip of the iceberg when we look at why we have gender disparity in the STEM fields (read here) but by taking a long, hard look at how advertising is effecting the way we raise our sons and daughters, we can impact this one variable today, this holiday season, and in the years to come.

    Categories: Kids, Science | Tags: , , , , , , , | Leave a comment